
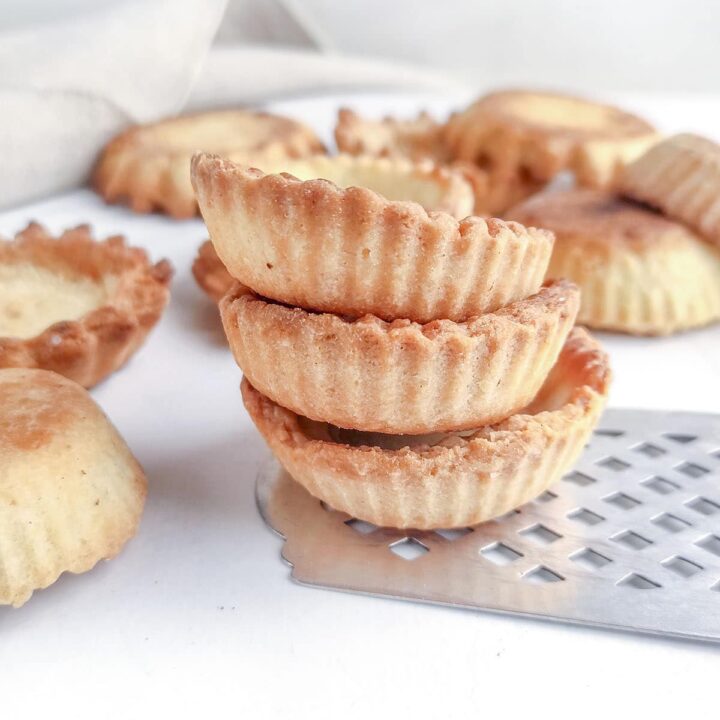
4 Ingredient Mini Tart Shells
This post may contain affiliate links. If you make a purchase after clicking a link, I may earn a small commission AT NO COST TO YOU. As an Amazon Affiliate, I earn from qualifying purchases.
When you have a spare few moments, making these 4 ingredient mini tart shells is super duper easy.
Rich, buttery and flaky, these simple tartlet shells are so versatile, they can be used for sweet or savory mini tarts, and once you give them a try, you won’t go back to store-bought tart shells again!
I love making foods from scratch, but I also like ‘simple and easy’. After my recent success with making my homemade self-rising flour and 2 ingredient buns, 3 ingredient bagels and Greek yogurt bread, I really wanted to keep going in the whole ‘baking realm’.
Enter this easy tartlet recipe.

Easy Mini Tart Shells Recipe With Four Ingredients
Ingredients And Substitutions (For sweet tartlette shells)
Most likely, you’ll have these basic ingredients in the pantry already. **If you’re planning on using these tart shells for a savory filling, you can skip adding the sugar.
- Flour: Plain, simple all purpose flour is perfect for this recipe.
- Sugar: I used powdered sugar to add that sweetness to the tart shells. In a pinch, you can use granulated sugar but the texture of the shells may change and the color of the bake on the shells may be a bit blotchy.
- Eggs: Eggs help add a lot of richness and flavor to the tarts. Use cold eggs for best results.
- Butter: Cut into cubes. It has to be very cold and hard. You can choose to use either salted or unsalted butter.
***EAZYTIP: Ingredients like salt, pepper, seasonings and oil don’t count towards the ingredient list because most people have these basic items in the pantry.

How to Make 4 Ingredient Mini Tart Shells
STEP 1: Cut in butter. – Add cold butter and flour to a food processor and pulse until the mixture resembles a sandy texture.
STEP 2: Add wet ingredients. – Add in the egg and mix again for one minute or until a rough dough ball is formed. If the mixture is too dry, add ice water by the tablespoon to reach a dough consistency that barely comes together. The testing sign that it’s ready is when a small amount is squeezed in your hand and it holds together, you’re ready to go.


STEP 3: Roll and cut. – Roll the dough to about 1/8″ thick. Cut out circles using a cookie cutter. Any extra dough scraps can be reformed and rolled out again, but handle the dough minimally. Place the dough circles into silicone cupcake liners or a greased cupcake tin.
STEP 4: Chill. – Cover the cupcake can with plastic wrap and chill the unbaked tartlets for an hour up to 24 hours.


STEP 4: Fork the bottoms. – While the oven is preheating, remove the plastic wrap and with a fork, pierce the bottoms of each tartlet 3-4 times so that during the baking process, the pastry doesn’t expand too much. **Optional step: Add a paper muffin liner on top of each tartlet and add rice, dry beans, or pie weights to help keep the tartlet expanding.

STEP 5: Bake and cool. – Bake the tartlets in a preheated oven for 15 minutes. Remove the liners and weights if you used them, and bake another 5-8 minutes or until golden brown. Remove from the oven, transfer to a chilling rack, and let them cool completely.

Tips & Variations for this Tartlette Shells Recipe
- To bring a flavor twist to the tart shells, you can also add some cocoa powder or a pinch of cinnamon powder to the tart mixture.
- If I want to make a savory tart (filling), I’ll remove the sugar from the recipe and add a pinch of salt. Adding extra herbs or seasonings is a wonderful addition to savory tart shells.
- When mixing the wet into the dry ingredients, do your best to combine everything until JUST mixed. The longer the mixture is mixed and worked, the tougher the shells will be.
- Make sure the thickness of the tarts is about 1/8″ thick. Leaving them too thick will cause them to stay undercooked in the middle, and making them too thin will cause them to break easily.
- Allow the tart shells to refrigerate in the cupcake molds for at least 1 hour or longer (or even overnight) if not longer. This will help make them nice and flaky.
How to Serve the Mini Tart Shells
These mini tart shells are super versatile- you can use them in lots of different ways.
I personally love filling them with some lemon curd, whipped cream, a nice berry compote or even some chocolate pudding.
And of course, you could try some savory options too. Caramelized onions, smoked salmon, cheese and chives are all great filling options for these little tarts.
I also think some 3 ingredient pumpkin fluff can be an awesome addition to these tarts, making them a great snack or dessert for fall.

Storage and Freezing
You can store these baked 4 ingredient mini tart shells up to 2 days in advance and store them in an airtight container in the fridge. When removing them from the fridge to bring to room temperature, remove the lid to let any moisture escape.
If you’re planning to make them in advance, you may want to freeze them in a freezer-safe container. They should stay fresh for up to a month, if not longer.
Did you try this mini tartlette recipe? If so, please leave a ***** star rating in the recipe card below and if you have any questions, leave a comment and I’ll get back to you asap. Thanks for stopping by, and I’ll see you next time!
4 Ingredient Mini Tart Shells
These mini tart shells require just 4 simple ingredients and deliver a flaky, delicious base for any filling. They're incredibly easy to make and perfect for any occasion!
Ingredients
- 1 3/4 cups flour
- 1/2 cup powdered sugar
- 3.5 ounces of butter from the refrigerator
- 1 large egg
Instructions
1. Placed the cubed butter into the flour in the food processor. Mix until it resembles wet sand. It's perfectly fine if you see visible crumbs of butter in the mixture.
2. Add the egg and process for 1 minute. Do not blend for too long, as this will can make the texture of the shells tough. The dough should come
together into a ball. If it falls apart, add 1-2 tbsp of ice water.
3. Gather the dough into a ball and place it on a board sprinkled with
flour. Roll out into a 1/8-inch thick ball. Cut out circles with a cookie
cutter.
4. Place in cupcake molds and press corners together with a flat
spatula. Cover and refrigerate the formed tart shells in the muffin tin for 2 hours or overnight.
5. Preheat oven to 350F. Make several punctures with a fork on the
bottom of the tarts. Place paper muffin molds filled with rice inside the tarts. Bake for 15 minutes. Remove the rice and paper molds and bake for another 8 minutes.
6. Remove from the oven and let the tarts cool on a wire rack and add toppings of your choice.
Notes
You can refrigerate the tart shells in the muffin tins (covered) for up to 24 hours.
Cooling the tarts on a wire rack without the liners helps to make them crisper.
Try your best not to overwork the dough to keep the shells tender and flaky.
If you want to make savory tarts, remove the sugar and add a pinch of salt or other herbs and seasonings for extra savoryness.
Nutrition Information
Yield 12 Serving Size 1Amount Per Serving Calories 149Total Fat 7gSaturated Fat 4gTrans Fat 0gUnsaturated Fat 2gCholesterol 33mgSodium 60mgCarbohydrates 19gFiber 0gSugar 5gProtein 2g
All nutritional information is based on third party calculations and is only an estimate. Each recipe and nutritional value will vary depending on the brands used, measuring methods and portion sizes per household.